Wraps for lunch!

IMG_7743

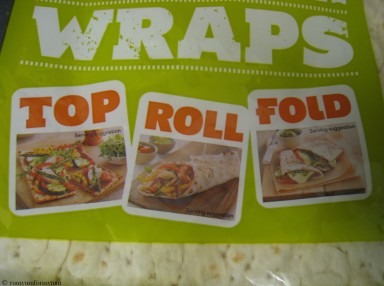
So I have been loving these Warburton’s Rectangle (although they are called ‘square’ ish on the packaging) Wraps. I have taken a photo of the serving suggestions as you can see above and I find the shape much more versatile than round tortilla wraps that I normally use. So far I have only tried them out with salad-like fillings on the inside but you can also place filling on the top and turn them into ‘pizzas’ of some sort by just popping them in the oven. I only wish they had a part wholemeal or healthier option as I don’t normally buy white loaves, apart from that I think they’re great.

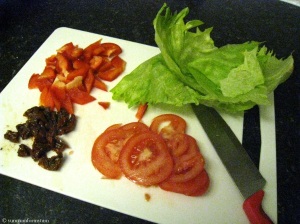
I tend to use my ‘normal’ salad ingredients but for today, just used whatever I could find in the fridge – large lettuce leaves, chopped red pepper, thinly sliced tomatoes and some chopped up sundried tomatoes too. Normally in salad I like to use mixed salad leaves (pre-packed) and add in some cucumber, sweetcorn and par-boiled carrots too and drizzle with some sundried tomato flavoured oil from the jar, but of course you can add anything you like. The other day I had one with cheese and ham (almost like an ordinary sandwich) but you could also add meat like chicken to beef it up (I tend to make up for this by eating two or three…).

Wrap filling prepped

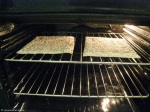
Whilst I’m prepping the vegetables, I like to just put them flat into the oven to warm up slightly but you could just warm them up in a hot pan too on a low heat.

Wraps warming in the oven

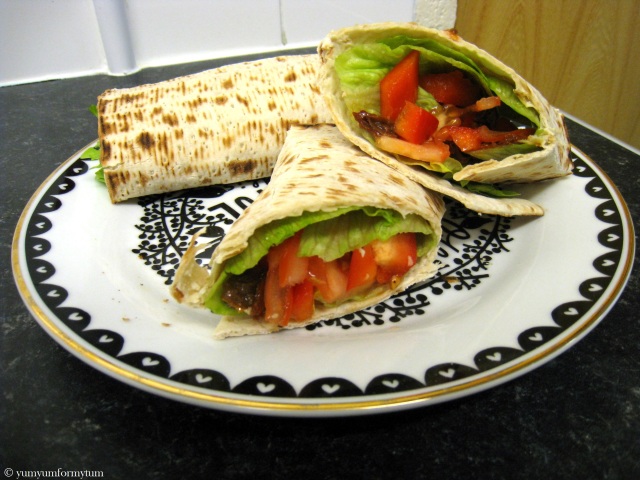
Finally assemble your filling with your wrap in whichever way you please and guzzle down for a lovely lunch!

Lunch time!

I would love to hear you ideas for favourite wrap fillings too so feel free to comment below!

Sun-dried tomatoes

This post is in praise of sundried tomatoes. They are scrumptious and incredibly versatile. Here are two ways I like to use them.

1. In Salad

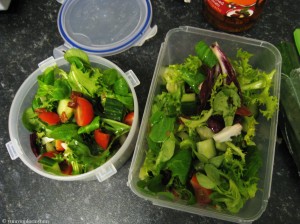
All salad requires is a few green ingredients, a few red ingredients and some mixing together. Pips. This is what I used.

Chop up everything into dainty little slices. Cut a few sundried tomatoes into into the mixture with some salad leaves. The oil from the tomato jar is also ideal for tossing the salad with, it adds a little hint of flavour. Done. I kept some extra in the fridge for a few days to serve with meals.

2. Flavouring Snacks

Inspired by my sister and mother who enjoy eating Ryvita I thought I would buy myself some of this healthy crisp-bread next time I was at Tesco’s. They like the ‘dark rye’ variety but I thought that was a bit too adventurous for me and so opted for the safe (or so I thought) sesame version. That was 3 weeks ago and I’ve only eaten three pieces. The first piece was not good. So I came up with a way to ‘yummify’ them. Slap on some philadelphia and sundried tomatoes and you’re good to go!

Any other suggestions for how to dress up my Ryvita?

Potato Chips!

So I did a post recently here on my ‘Dinners of the Week’ where I featured these homemade potato ‘chips’ (even though they’re really just baked potato slices). I thought I’d just share this idea because they are extremely easy to make as long as you have an oven! I don’t think I’ve been taking full advantage of unlimited oven use in my student flat so here’s a way to do just that. I think they are also healthier than buying chips/wedges from the shop because they don’t have any added salt etc and you can customise them with cheese or herbs as you please too.

Potato ‘Chips’ 

– Any potato will do, I used early new potatoes (Charlotte) but roasting potatoes would be fine too

– Oil, any kind (although olive oil if you have it)

– Seasoning of choice, salt, dried herbs, cheese?

If you are using new potatoes you don’t even have to peel them, simply rub off their skins under running water (it doesn’t have to be perfect). Roasting potatoes will need proper peeling. Slice lengthways into slices of width of half  a centimetre or so. Drizzle with a little oil (I used sunflower) and season with a pinch of salt. Add dried herbs if you wish. (I would save the cheese until the potatoes are nearly done so they are crisp underneath)

Bake in a preheated oven at 180-200 degrees on the top shelf for a good 30-40 minutes.

Do turn them over a few times and move them around so that they get an even colour distribution.


They are ready when crisp and golden. Serve immediately (with ketchup on the side if you’re me).


Stuffed Peppers with Halloumi and Couscous

I liked peppers and couscous, especially together – and these are extremely easy to make. I have used mozzarella to top these in the past but I saw a recipe with halloumi cheese which just adds a little more bite to the cheese. The flavour of the halloumi is still relatively mild though so does not overpower the peppers. It might be an idea to top the peppers when filled with the couscous with a thinly sliced tomato because otherwise the couscous can be s little dry; this just seals the flavours more.

Stuffed Peppers with Couscous and Halloumi, serves 3-4

Preparation Time : 15mins

Baking Time : 40mins

-2-3 large red peppers

-Sundried tomatoes

-50g couscous

-100ml vegetable stock

-Parsley and/or other herbs

-Halloumi cheese

First prepare the peppers by cutting and half. Remove the stalks and deseed.


Place on a baking tray and drizzle with a little olive oil and bake for 20-25 minutes at 200 degrees Celsius until the peppers are soft. I also seasoned them a little with salt, pepper and some dried herbs. Meanwhile prepare the couscous by adding hot stock to it and cover for a few minutes. Fluff up with a fork and season.

Cut up small chunks of the halloumi and add to the couscous. Remove the peppers from the oven and fill with the couscous and cheese. Top with a thin slice of tomato if preferred and return the stuffed peppers to the oven at the same temperature for 15 minutes.


cooked as part of this menu

Omelette – The First Attempt

So I had never made or eaten an omelette before until about half an hour ago. Omelettes are great for quick snacks or accompaniments to meals because all you need are eggs and you can chuck in whatever takes your fancy. I thought I would make one because we have so many boxes of eggs thanks to the chickens at the farm I recently started working. I called this my first attempt because I know that there are lots of things I could improve on for next time, so here’s the slightly haphazard ‘recipe’ I used.

First I cracked two fresh eggs into a pyrex glass jug (I find these easier to pour into the pan as opposed to a regular bowl) and mixed. Season with salt and pepper to taste. If you have some herbs like chives or parsley or other herbs, now would be a good time to tear them up and mix with the egg. Heat up a medium sized pan (about 20-30cm in diameter) and add some olive oil. Make sure the pan is relatively hot before adding the eggs. Meanwhile prepare your filling. I used finely chopped peppers and some ham in mine, but any vegetables, meats, and cheeses work nicely too. (Maybe leave your favourite combinations in the comments below and I’ll be sure to try them out?)

Turn your pan down to a medium heat and pour in the eggs.Keep turning and mixing very gently (you don’t want it to become scrambled) every 10-20 seconds so that different parts of the omelette will cook. Obviously you don’t want liquid uncooked egg in the middle with your filling when you sit down to eat it. When about 2/3 of the egg is cooked, sprinkle on your filling of choice. Carefully use a spatula to ease off half the omelette and fold it over the other half so that your filling is sandwiched in between. The omelette should now be semi-circle shaped, cook for 4-5 minutes until ready and serve immediately.

I ate this for dinner with some toasted homemade soda bread baked lovingly by my mother and it made a delicious meal!


Noodles with lettuce and egg

I had this for breakfast this morning. I also took some photos of the packet of shrimp-flavoured noodles so you know what they look like.

It is very similar to the recent posts that I have done about frying vegetables with the noodles. I also added in some fried egg. To do this, whisk the egg together first in a bowl and pour into a lightly oiled pan. Cook like a pancake and cut into strips before adding to noodles.


Couscous lunch.

I seem to be posting a lot of photos of my lunch recently. I think holidays are great for experimenting and trying new warm lunches rather than having cold sandwiches at school again. Anyway, here’s what I had today.

So basically I chopped up a yellow pepper into quite small chunks. Then I seasoned the dry couscous in the bowl with salt and pepper. Next I poured almost boiled water into the couscous until most of the couscous has absorbed some (I don’t like it soaking). Then cover with a lid. Meanwhile I grated some mild cheese and put this into the couscous, fluffing and mixing it in with a fork to allow the cheese to melt a bit, then pop the lid back on. Finally add the peppers and a handful of ripped basil leaves. Et voila! – done in less than 10 minutes. I also toasted some leftover bread with butter and served with a steaming cup of green tea, my favourite!


Leftovers from our Easter Meal – Stuffed Peppers with Red Rice & Quinoa

We don’t really celebrate Easter, but seeing as my mother had invited some friends over for dinner, that kind of prompted the food feast we had yesterday. I went to bed absolutely stuffed. I was fine after the main, but then that crumble and custard… Anyway, I thought I’d share a new recipe – stuffed peppers with red rice. Now I have to confess I didn’t actually do the cooking as it’s only 3 weeks until my dreaded exams so I was banished to my room to work, then summoned for food (turned out to be a great arrangement!).

It’s a tad confusing to me that it’s in a pasta bowl, but you’ll just have to ignore that. Recently I have been raving about wild rice, then my mother brought some red rice for us to try, and yes, that’s also great. It takes quite a bit of cooking – 35-40 minutes. They are dark red/black in colour and wonderfully chewy. Here, we mixed it with some quinoa which just gives some variety to the texture.

You can cook both in a pan of water first seasoning with salt, pepper and a drop of oil/soy sauce. Meanwhile, prepare the peppers. Red, orange and yellow all work well due to their cheery colour and natural sweetness. Chop in half (I find it easier to chop horizontally so you get top and bottom separate) and remove the stalk and seeds. Fill with the red/wild rice and quinoa and cut some thin slices of tomatoes to cover the tops. This stops them from drying out really. Season again if preferred and them place in a moderately hot oven. If you are cooking other things, just shove these in when you have space and keep an eye on them. As long as they don’t burn, they’ll be fine.

Remove when the pepper’s are relatively soft (it depends on how you like them) and serve warm. I’ve also tried this with stuffed couscous (fluff up with boiling water first) and mozzarella (this melts in the couscous), topped with some chopped basil – for a more Italian theme. But again, you can really experiment and try different flavours without worrying how it’ll turn out because you can’t really go wrong!

Have fun and Happy Eating!

Individual Pizza Margheritas

So I am embarking on cooking dinner tonight, hence the busy-ness (I always read business as bis-ness, never busi-ness, so thought I’d make it clear) on the blog. First up are individual pizza margheritas. This recipe is very flexible and makes 4 small individual pizzas or 1 large one. It’s the same recipe that I use for making ordinary white loaves, only just scaled down. Here’s how I make it.

Pizza Margheritas, makes 4 individual pizzas or 1 large pizza

Mmmm...pizza

Preparation time : 25 minutes + 1 hour proving

Baking time : 25 minutes or until crust is pale brown and crispy

– 150g strong white bread flour

– 1/2 tsp flaky sea salt

– 1/2 tsp fast-action yeast

– 100ml warm water

– 1tbsp extra-virgin olive oil

– 1/2 clove of garlic

– 70ml of passata (crushed and sieved tomatoes)

– 1/2 tsp dried oregano

– Handful of basil leaves or a few tsp of dried herbs

– 60g mozzarella, sliced

-Handful of cherry tomatoes

First, make the dough.

Dough-making commencing!

You can either mix in a bowl or on a very clean floured surface. I normally clean the surface with water and then dry with a paper towel. My post on how to bake a classic white loaf with give more detail in dough-making. Add the flour, yeast and flaky sea salt and toss until mixed. Next add in the tsp of extra-virgin olive oil. A good tip is to mix the warm water afterwards to clean the spoon so you don’t waste any of the oil. The temperature of the water is very important in making dough. Water that is slightly warmer than tepid is just fine. If the water is too hot, it will denature the yeast and your dough will be unusable. Use your hands to bring the ingredients together into a relatively gloopy mixture.

Turn out your dough onto a lightly floured surface so that it does not stick. Knead for about 10 minutes until the dough springs back when dented. Be sure to properly work the dough to stretch it out and activate the gluten by adding air to the mixture.

When you are satisfied with the dough after 10 minutes, shape into a ball and place into a large floured bowl. Cover with cling-film or an elasticated showed cap (thank you Fabulous Baker Brothers for the tip!). Leave in a warm place for an hour to prove. It should double in size at a warm temperature, if not, leave a little longer.


Whilst the dough is proving, you can make a start on the pizza topping. To make the tomato base, crush the garlic into a bowl. I find it easier to chop finely first and crush with the back or the knife. Add the dried oregano and torn fresh basil (or mixed dried herbs) as well as the passata. Mix and season well with salt and pepper.

For the margherita topping, slice the mozzarella and cherry tomatoes. The great thing about this recipe is that your can personalise the toppings so feel free to explore! Use the back of a spoon to spread the tomato sauce over the pizzas, remembering to leave room for the crust. Add the mozzarella and a few cherry tomato halves and any other toppings you wish (I added a few pieces of pancetta from the bolognese main I was making as well – upcoming post!)

Zap into the oven at 240 degrees for about 25 minutes or until the dough is crisp and nicely browned.

The versatility of these pizzas also extends to being freezer-friendly. This saves time if you want to make a batch in advance and then cling-film them for the freezer for a quick meal when you are in a hurry!