An Evening of Baking

Who doesn’t love an evening spent baking? I thought I’d make some of my passion fruit cake and some brownies to take along to a picnic at our local parkrun tomorrow to celebrate its first year anniversary (see links for recipes). I actually bought some espresso flavoured Green & Black’s which is absolutely scrummy for the coffee lover in me – the flavour came through the brownies just the right amount I thought (and slightly easier than going through the faff of making some strong instant coffee).

  Coffee and Hazelnut Brownies

 Passion Fruit Cake with Coconut Crumble Topping

Inspired by the Great British Bake Off ‘s most recent episode, I also attempted Paul Hollywood’s recipe for an eight-strand plaited loaf which was the technical challenge in the episode.


In hindsight I should have made slightly thinner strands to make a longer loaf as mine was fairly ‘chunky.’ But I think it looked pretty good even though I freestyled a bit towards the end as some strands were running out before others!

I do love the recipe’s crunchy golden crust though!

Not much left over after the gannits in our house had their share…

Please comment or share your own pictures if you had a go or made anything yummy recently! I would love to hear from you. Ta-ra!

Peanut Butter Cookies

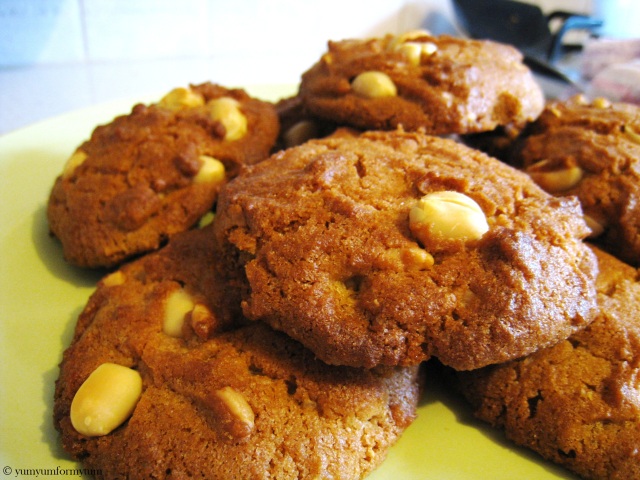
Peanut Butter Cookies, makes about 20 small cookies

Preparation Time : 20 minutes

Baking Time : 10-15 minutes


I LOVE peanut cookies, but not peanut butter which I always thought a bit weird. Anyway, these cookies are yum and extremely easy to make, nice and crumbly with good peanut flavour. Read on to find out how I made them;

– 80g unsalted butter, softened

– 3tbsp sunflower oil

– 50g demerara sugar

– 50g golden caster sugar

– 1 large egg, beaten

– 100g plain flour

– 1/2 tsp baking powder

– 1/2 tsp bicarbonate of soda

– 70g peanuts

First cream the butter, peanut butter with the sugars until light and fluffy. Mix the egg in. Next sift the flour, baking powder, bicarbonate of soda gradually until the mixture comes together forming a dough. Finally mix in the peanuts (I used unsalted peanuts as they are healthier and toasted them on a hot pan for 10 minutes or so, but salted peanuts work just fine too).


Using two spoons, take small balls of the dough and place onto a parchment-lined tray using the other spoon to scrape the dough out. I would leave about 10-15cm in between each cookie to allow room for spreading out in the oven. Bake in a hot oven at 180 degrees Celsius for 8 minutes, then flatten out the cookies with a spatula if they have not already flattened out. Bake for another 5 minutes or so until done. I prefer mine a little softer in the middle so 10 minutes was enough for me.

Cool on a wire rack after a few minutes since removing them from the oven. Eat immediately…

Chocolate Pecan Crunch Biscuits

I originally made these biscuits as a gift for one of my best friends and substituted the single egg with yoghurt as she cannot eat eggs – they look beautiful wrapped up with ribbon! They are not too chocolatey and I think go well with the pecans. Also these biscuits are so easy to make and do not take long at all! Here’s how I made them.

Chocolate Pecan Crunch Biscuits

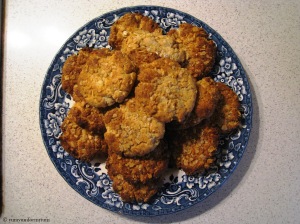
A plateful of biscuits…

Preparation time : 20 minutes

Baking time : 12-18 minutes

– 100g dark chocolate (I used Green & Blacks 70% dark chocolate)

-80g unsalted butter

– 50g light muscovado sugar

– 85g golden caster sugar

– 1 tsp vanilla essence

–  1 beaten egg, or a few good dollops of plain yoghurt/milk

– 100g pecans, finely chopped (or whizzed in a blender) + some whole pecans for decorating

– 100g plain flour

– 1 tsp bicarbonate of soda

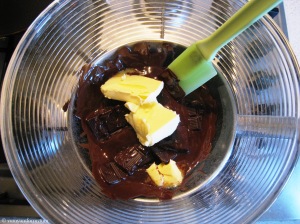
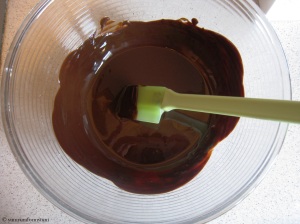
First melt the chocolate and butter over a bowl of gently simmering hot water. Stir so that they are thoroughly mixed, the chocolate mixture should be very silky and velvety. Stir in sugar until dissolved.


Take the bowl off the heat and add vanilla essence. Add in the egg (once mixture is cool enough) or yoghurt if using. If you have not already, very finely chop the pecan nuts or zap in the blender (this is easily done before and will reduce preparation time a lot). Stir the pecans in. Then, sift the flour and bicarbonate or soda in until the texture becomes a little thicker.

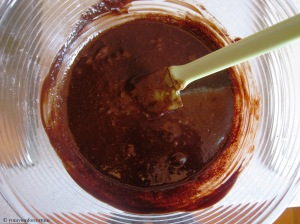
If the mixture is still relatively soft and there is still liquid at the bottom, adjust by adding in more plain flour. This is how my biscuit mixture looked;

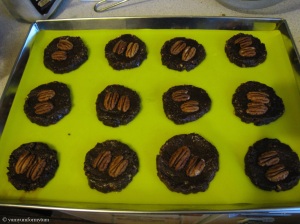
When you are happy with the consistency, you should be able to dollop little balls onto a pre-greased/lined baking tray. I like to use a large tablespoon to flatten the ball and then round off the shape with my fingers. Leave about 5cm+ (just to be safe) in between the to be baked biscuits on the tray to allow room for spreading. Decorate with two whole pecans gently pressed into the top of each biscuit mixture. Bake in an oven at 180 degrees for 12-18 minutes depending on the oven strength.

Before…

…after

Remove from the oven when the biscuits are still a little soft as they harden when they cool and you don’t want them to be too crunchy to bite! Leave on the hot baking tray for a few minutes then remove and…

Cool on a wire rack.


Happy Eating!

Deliciously chocolatey brownies

I love brownies. But there has been much debate about what the best kind are. Felicity Clarke’s post http://www.guardian.co.uk/lifeandstyle/wordofmouth/2010/sep/09/how-to-make-perfect-brownies discusses just this very topic. Personally, I like them crisp on the top but slightly gooey inside, flooded with nuts and enveloped in dark chocolate so that they are  decadently rich to bite. But that means I have a limit of one (two if starving) a day. In my opinion, brownies are supposed to be incredibly rich, they are not like any ordinary snack bite which you gulp down. You have to savour them. Especially when made by your own fair hands.

Homemade Brownies, makes 16

Preparation time : 30 minutes

Baking time : 20-25 minutes (depending on oven strength)

Brownie pile up!

– 180g unsalted butter, at room temperature

– 100g dark chocolate (at least 70% cocoa solids)

– 75g assorted nuts (macadamias, hazelnuts, walnuts are all good choices), roughly chopped

– 4 eggs

– 250g golden caster sugar

– 1tsp vanilla essence

– 100g plain flour

– 25g cocoa powder

– 1/2 tsp flaky sea salt (this brings out the flavour of the chocolate even m0re)

First put the chocolate and butter into a large heat-proof bowl. Place on top of a saucepan of hot water. Simmer gently on the hob.

Stir gently until all the butter and chocolate has melted completely into a silky ‘liquid’. Remove from the heat and leave to cool.


Beat the eggs, golden caster sugar and vanilla essence together in another bowl.


(I can count to four by the way, but I was only making a small batch of brownies, hence only two eggs) This mixture should be quite elasticky (I’m not sure that’s the write word), but basically the texture raw egg normally is but thickened with some sugar. Now that your chocolate mixture has had time to cool, you can mix these two together. I find a spatula really useful for scraping the thin chocolate mix together.

Add the flour and cocoa powder, as well as that pinch of sea salt to really enhance the rich chocolate.

Finally, stir in the chopped nuts.

Pour into a lined baking tray (add a sprinkle of extra nuts) and put in the oven at 180 degrees for 20-25 minutes. The cooking time depends on the strength of your oven and how you like your brownies baked. Change baking time accordingly. When they are cooked, remove from the baking parchment and leave to cool on a wire rack. Slice into squares ready for eating.

Delicious!

Yummy Oat and Hazelnut Biscuits

These biscuits are great as an accompaniment to a steaming cup of tea. The hazelnut flavour manages to balance the oaty goodness, finished off with a fantastic crunch! (although if you like softer cookies/biscuits, you may like to cook for a few minutes left so that they are not completely crunchy). They are really easy to make after you have  mixed up the biscuit mix. Be sure to bake soon after preparing the mixture though. You can also add any flavourings you like, substituting oat and hazelnuts for peanut butter and peanuts, or chocolate chips give good results too I’m sure!

Oat and Hazelnut Biscuits, makes 18

Preparation Time : 20 minutes

Baking Time : 12-15 minutes on a middle shelf

– 175g butter

– 4 tablespoons vegetable oil

– 120g golden caster sugar

– 1 egg yolk

– 1 tsp vanilla essence

– 250g self-raising flour

– 75g rolled oats + extra for topping

– 75g finely chopped hazelnuts

First cream the butter and sugar together. Add the oil.


Then add the self-raising flour, about 50g at a time, , mixing gently until no more white bits of flour are visible.

Separate the egg, adding only the yolk to the mixture, as well as the vanilla essence.  It will be quite tough as the flour makes it quite dough-y. 

Next finely chop the hazelnuts. I used a small blender as it is much quicker and cuts them very finely – if you’ve got one handy.

Finally add the hazelnuts and oats into the thick biscuit mixture. Be careful not to overwork it – I find it easiest to mix it in with my hands so that the hazelnuts and oats are spread out evenly.

Then take small chunks the size of a table – tennis/ping – pong ball and shape into a round ball. Spread out onto a large baking sheet lined with baking parchment. The eventual size of my biscuits were about 6-8cm, so anticipating this kind of size, spread out accordingly leaving space in between. When they are lined up on the baking sheet, take a sprinkling of oats and place on each biscuit piece, flattening the top slightly.

Bake for 12-15 minutes in a preheated oven at 200 degrees. If after about 8 minutes or so they haven’t spread and flattened, use a spatula to gentle pat it down. They should be golden brown when done.

Cool the biscuits on a wire rack so that the bottom remains crisp.

All done! Quick and simple – my favourite kind of food preparation.

Fruit and Nut Biscotti

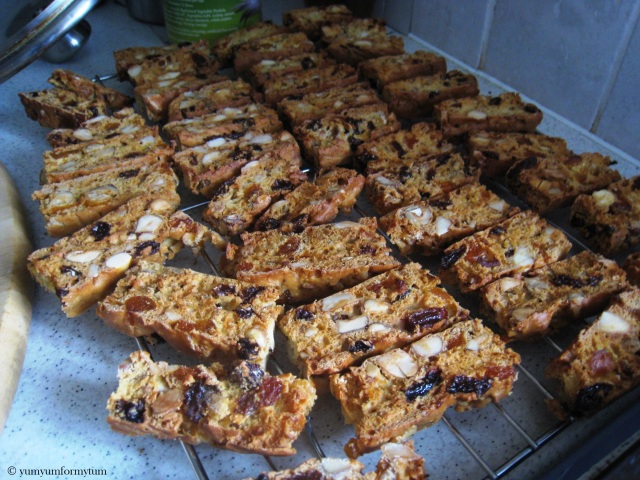
This is a firm favourite in our household ever since discovering this pipsqueak easy recipe. It’s fairly healthy – no butter just plenty of assorted dried fruits and nuts along with plenty of baking time. Biscotti is the Italian word for any type of biscuit, however it has become associated with the long, hard, twice-baked biscuits more specifically known as ‘cantuccini.’ Cantuccini are traditionally almond biscuits originally from Tuscany in Italy and were served with coffee or wine. Biscotti derive their name from the words ‘bis’ – twice and ‘cotto’ – cooked or baked, ie.twice-baked. However, nowadays biscotti come in many varying flavours (chocolate/cappucino/almond) and textures (crisp and dry, to some softer cake-like ones). They last up to 6 months in a sealed container (ensure that it is dry as moisture will soften the biscotti) – but you can always whiz them into the oven again if they’ve lost a lot of crunch. I didn’t actually make this batch in the photograph but after my mother baked a fresh lot today I thought I’d share the delightful recipe!

Fruit and Nut Biscotti, makes about 50
Preparation time : 35 minutes

Baking time : 1hour +

-500g plain flour

-400g unrefined caster sugar

-1 tbsp baking powder

-300g of mixed dried fruits (I recommended apricots, cranberries, sultanas – but anything works really, it’s also nice to add some different colours!)

-300g of mixed nuts (hazelnuts, almonds, pistachios – try to stick to quick tough nuts to complement the dry crunchiness of the biscotti)

-Finely grated zest of 2 lemons

-7 eggs, lightly beaten (this may seem excessive but trust me you read seven)

Sorry there are no accompanying photos for this post – I’ll do my best with the descriptions.

First as always, line the baking sheet. I recommend opting for a large shallow tray that fits a whole shelf in the oven (a swiss-roll tray works well). If you don’t have any, you can also use a few smaller ones.

Mix all the dry ingredients first into a large bowl; flour, sugar and baking powder – then add the fruit, nuts and lemon zest mixing thoroughly to get an even distribution. Crack all seven eggs into a bowl and lightly beat. Add them to the dry mixture about 1/4 at a time. The dough should become quite tough (not too wet) but persevere and make sure you have mixed all the flour.

Spread the mixture onto your baking tray thinly at about 2-3cm height. Thicker biscotti takes a lot longer to bake and creates large slices. Bake for 15-20 minutes at 180 degrees until golden brown. At this point, I also like to remove the large biscotti layer from the baking parchment as is no longer sticker. Turn over and bake the other side for about 15-20 minutes. Make sure the biscotti does not brown too much, if it starts to burn, lower the temperature. Remove the large biscotti sheet from the oven and place on a chopping board.

Slice the biscotti systematically into very thin centimetre wide slices. Arrange these on the baking tray on their side so that the biscotti can dry out in the middle as well. Return to the oven at a lower temperature of 140 degrees or so and bake for about 10 minutes either side (don’t turn them when they’re piping hot though otherwise you burn your fingers – trust me I know from experience, wait a few minutes for them to cool slightly). When you are satisfied with the crispness (it’s no harm to sample a few), leave to cool thoroughly on a wire rack.

Biscotti provide a delicious snack with afternoon coffee (my mother’s favourite) or as a light snack for school or work.